Visualizing The Photo – A Mount Hood Wedding Portrait
Visualizing the Shot Before You Arrive
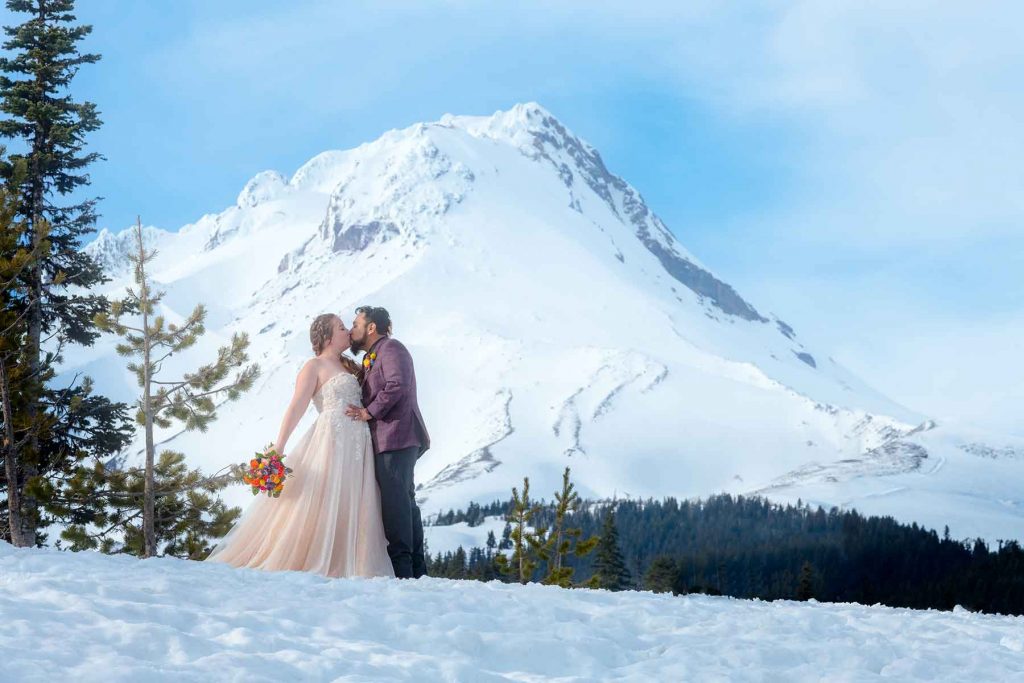
I’m glad to be known primarily for my landscape photography, although I certainly don’t limit myself to just one genre. Landscapes are what drew me back into photography in the first place, and that passion shows through in every photo I take—regardless of subject. This Mount Hood Wedding Portrait turned out just how I planned.
Clients often come to me specifically because of my landscape background. They’re looking for a one-of-a-kind outdoor portrait—something timeless and deeply rooted in the natural beauty of Oregon. Because of that, I always have a mental catalog of locations ready that will deliver exactly the kind of image they expect from me.
The Location: White River Snow Park
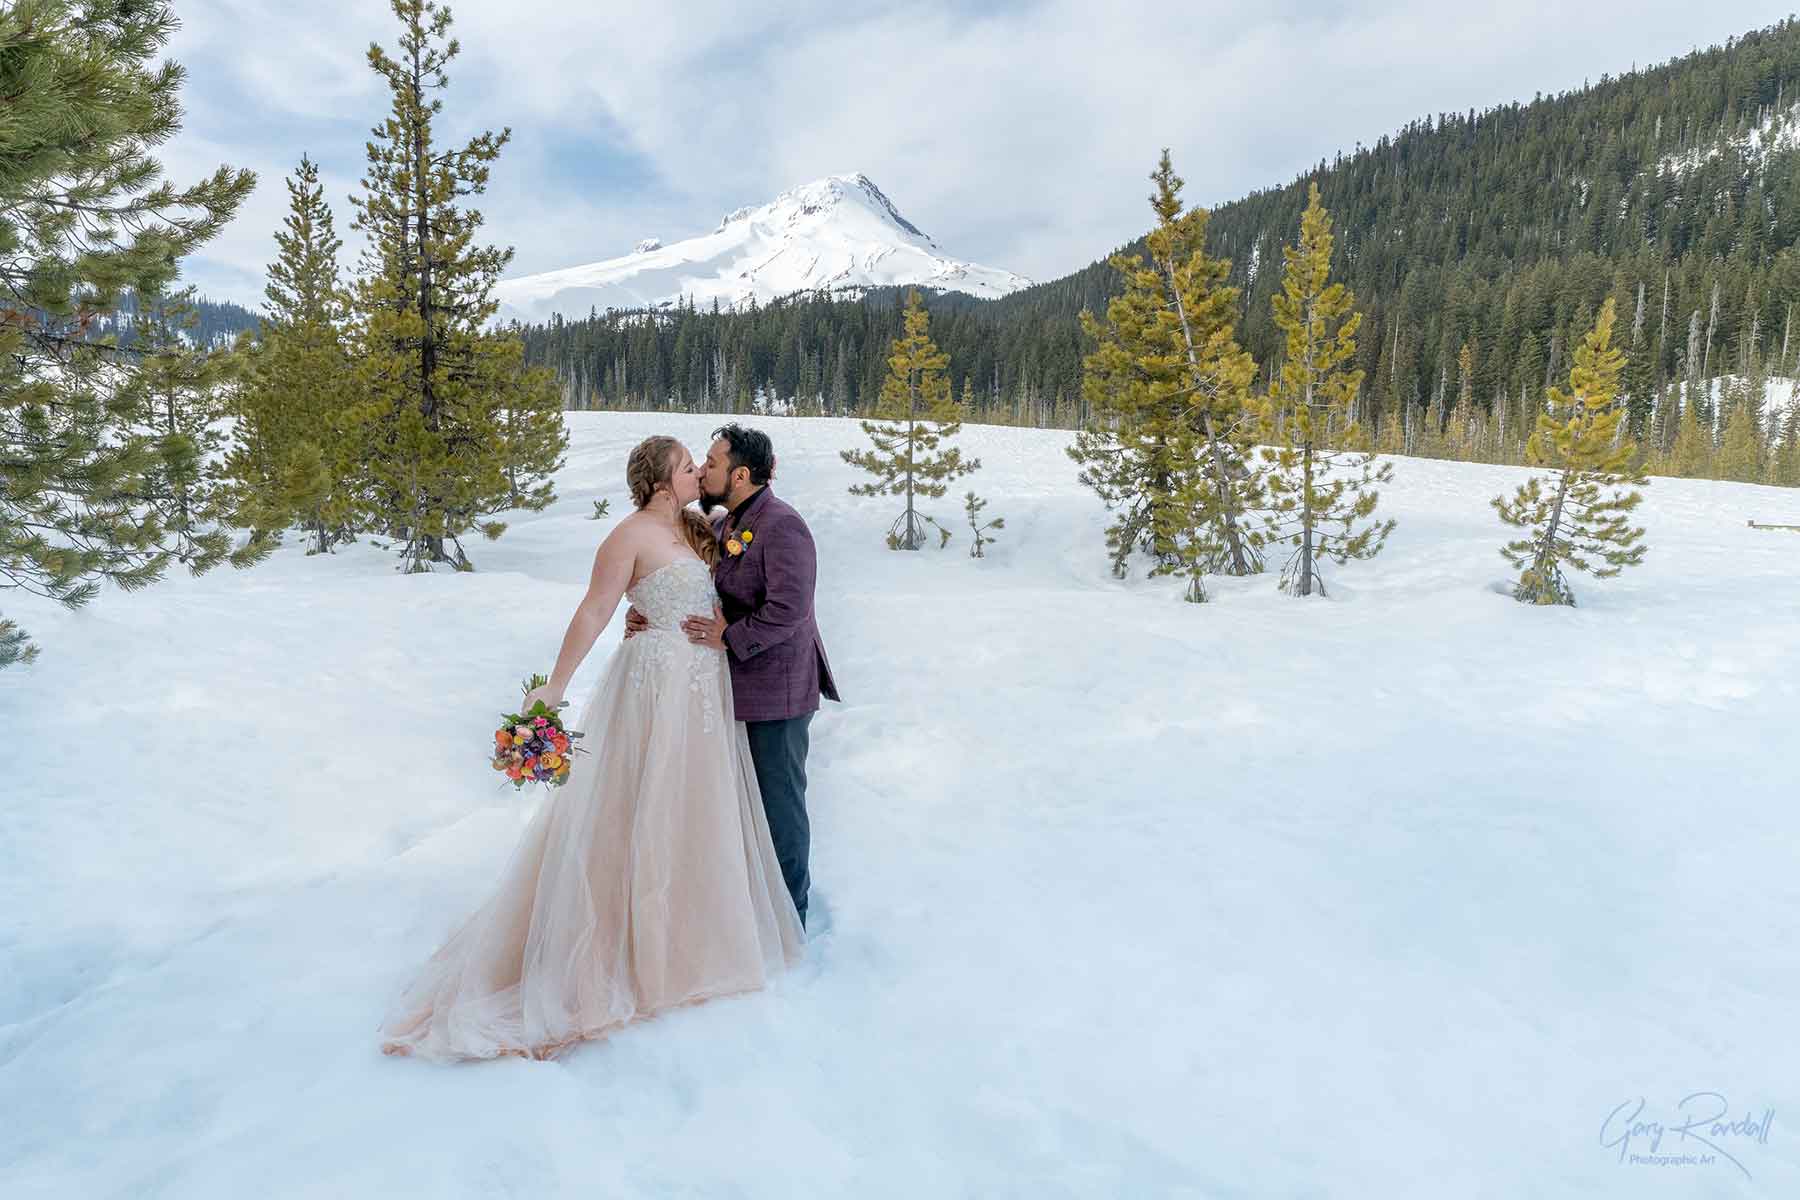
This photo session is a great example. The couple wanted a portrait with Mount Hood behind them. We were lucky to get a window of clear skies, so I suggested White River Snow Park on the mountain’s east side. It can get crowded, but the view is worth it—and any stray hikers in the background can be easily removed in Photoshop during post-processing.
We found a spot with trees in the foreground, giving the photo a feel of seclusion—like they were at the edge of a wilderness forest. Even with people nearby, the composition gave the impression of intimacy and solitude, which was exactly what I wanted.
The Vision: Creating a Sense of Scale
I shot a variety of compositions at focal lengths between 24mm and 35mm. They turned out fine, but I had a very specific image in my mind: one where the couple stood in the foreground with Mount Hood looming large in the background. A wide-angle lens couldn’t give me that sense of scale or drama.
I knew the location well, so as we arrived, I began scanning for the vantage point I had already envisioned. I drove straight to a spot where I knew I could pull off the shot. Thankfully, it didn’t require much walking—important since the couple was dressed in formal wedding attire and surrounded by snow.
The Technique: Lens Compression for Impact
After we wrapped up the initial shots, I asked the couple to stay with my assistant while I returned to my car to switch lenses. They were standing on a snowy ridge just above the parking area, perfectly aligned with Mount Hood in the background.
From a distance, I mounted my 200mm lens on my Nikon D850, zoomed in to 160mm, and stopped down to f/14 to ensure a deep depth of field. Once my assistant posed the couple, I took the shot.
Using a longer focal length from that distance created lens compression, a technique that made the mountain—five miles away—appear much closer and more prominent in the frame. It’s a simple yet powerful method to create dramatic, memorable images.
Final Thoughts: Know Your Tools, Know Your Vision
Understanding your location and the capabilities of your gear allows you to visualize the photo before you even arrive. This kind of pre-visualization makes the shoot more efficient, more creative, and less stressful—for both you and your clients.
Knowing techniques like lens compression and the limitations or strengths of your camera setup helps you create compelling, professional-quality photographs, even in challenging environments. This example of a Mount Hood Wedding Portrait serves to demonstrate how to push your technique as far as possible.


